Automate personalizing multiple letters
Learn how to use Mail Merge in Word 2010
Introduction (00:04)
Welcome to Business Productivity – I’m Ulrika Hedlund. Even though most of our communication today is done using email there are still times when you want to send out letters. You might want to send out letters to your customers informing them about a change in your service, or you want to send out an invitation to a party or an event. Whatever your reason is for writing a letter you should make sure that the letters are personalized. The recipient will be much more inclined to read the letter if they feel that this letter is addressed uniquely to them. The good news is that you don’t have to spend time writing each letter one by one, there is a way to automate this.
In this video I will show you how you can use something called “Mail Merge” in Word 2010 to automate the process of personalizing multiple letters. Mail Merge can be used both for printed documents as well as email messages, but in this video I’ll focus on how to create a letter. I’ll also show you how you can add some flexibility to your letter so that you can reuse it multiple times. Let me show you!
Introduction to Mail Merge (01:13)
On April 4th, we’re having a Business Productivity workshop for some of our customers. The attendees will be arriving to the hotel the night before the workshop. And when they arrive, each of the 14 participants will be given this welcoming letter:
Now, we’re going to use Mail Merge to personalize these letters. First there should be a greeting line, addressing each of the 14 attendees with their first name. Then we have some general information such as the date, the hotel, the conference room. And even though this information is the same in each of the 14 letters we’re going to add some flexibility here, so that we can use this letter again if we have another workshop, because then this information will change.
Finally each of the participants will be assigned into a team, depending on their department. So we’re going to add some logic into this letter to assign them to the right team.
Start Mail Merge (02:07)
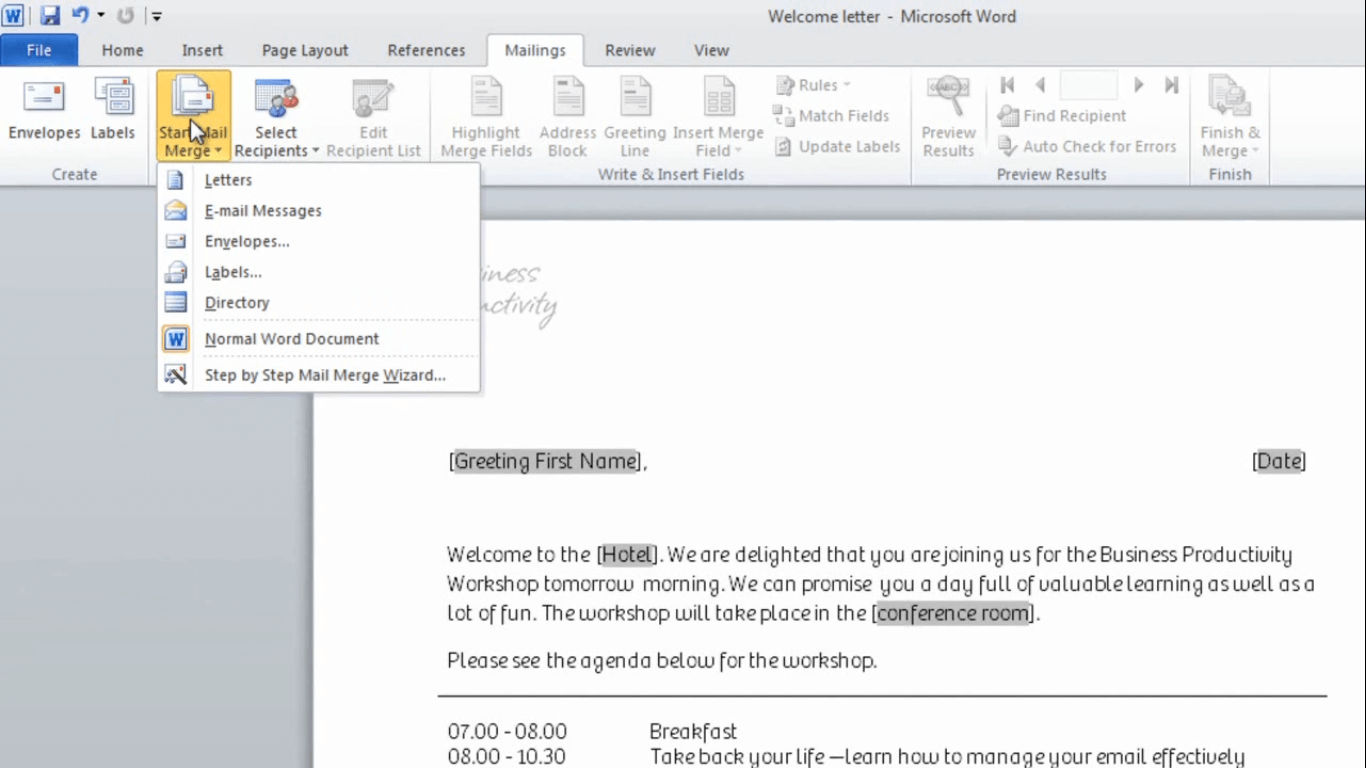
To start the Mail Merge, go to the “Mailings” tab and then click “Start Mail Merge”.
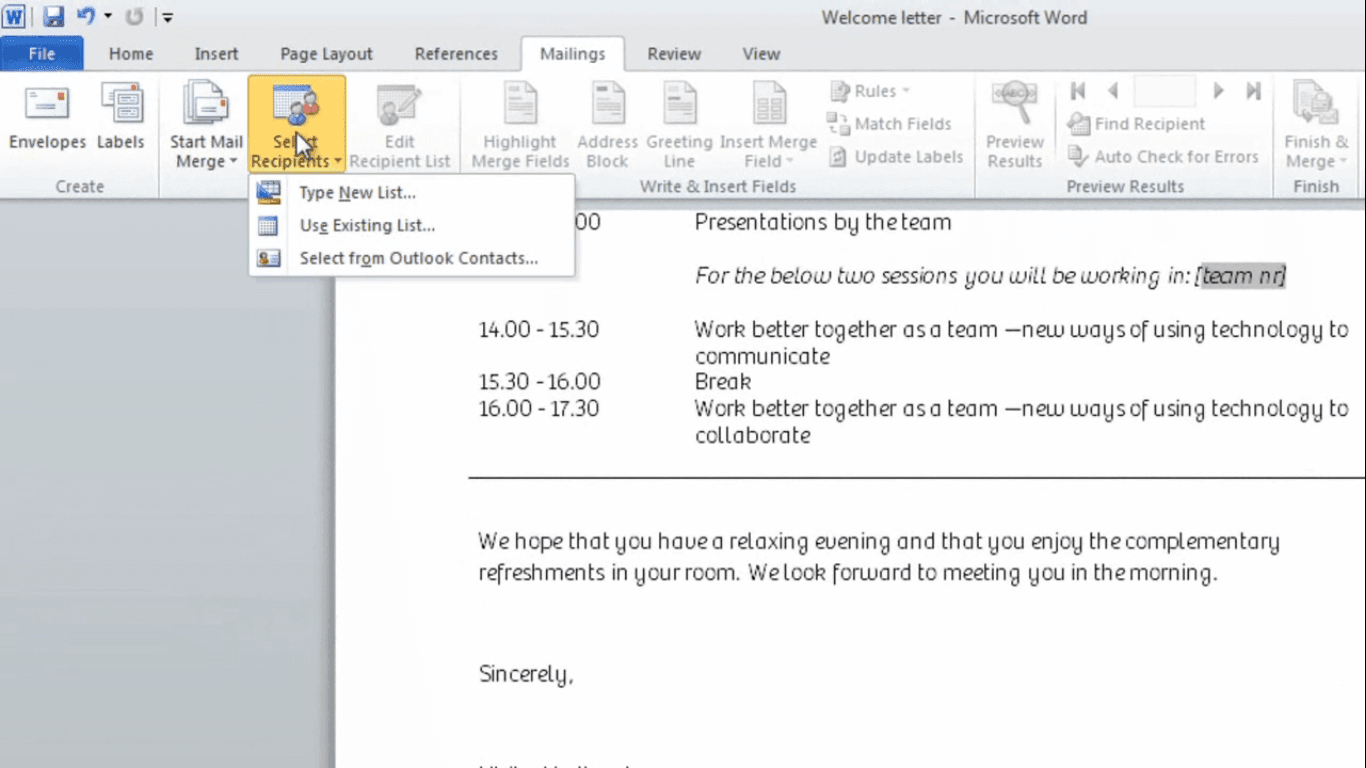
Here you can select between a number of different options but since we’re writing a letter we’re going to select the first one; “Letters”. This has now been converted into a Mail Merge document and we can continue with the next step, which is to select the recipients. You can select recipients from a number of different sources, you can type them in new list, you can use an existing list, such as an Excel spreadsheet or an Access database, or you can select from your Outlook contacts.
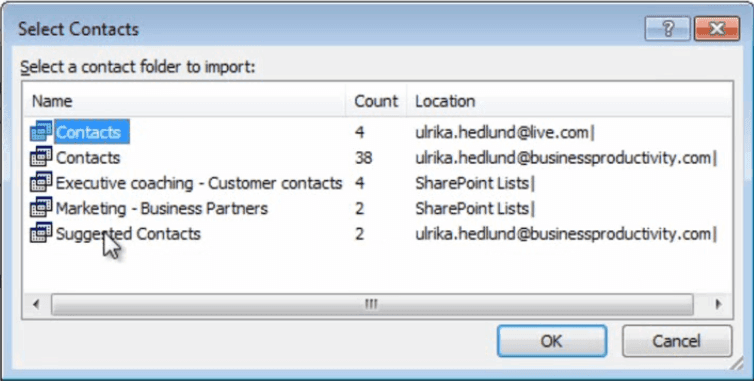
Since I have all of the participants in my Outlook contacts I’m going to select this option. Here I can select between the different contact folders I have in Outlook and I’m going to select my main contacts folder that’s associated with my business email account.
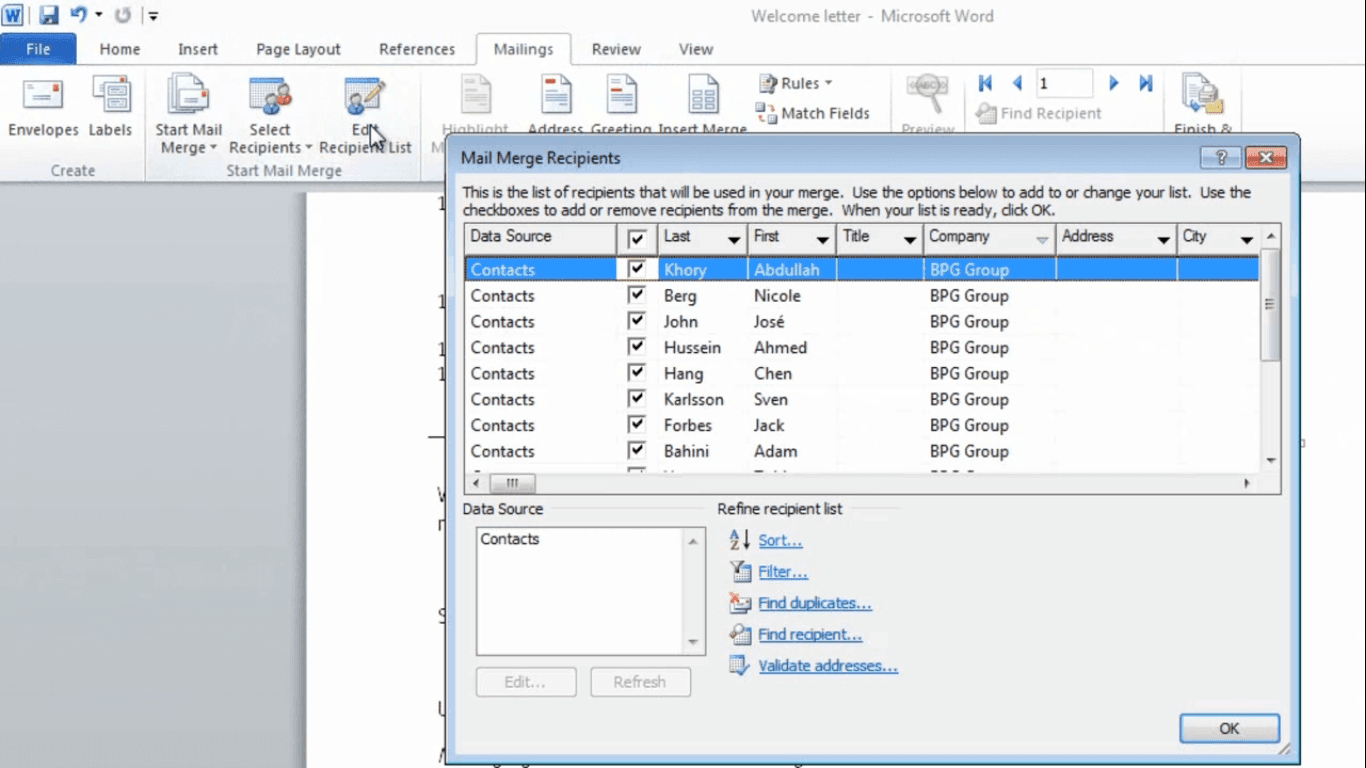
And click “OK”. Here I’ll get all of the contacts that I have in my contacts folder and I only want to select the ones from the company BPG Group, so to do that I’ll click “Filter”. Here I’ll select “Company”, and I’ll type in the company name and click “OK”.
Now, only the contacts from the BPG Group will be selected and since all of these are coming to the workshop I’ll just click “OK”. You can always go back and edit the recipient list at a later stage by clicking “Edit Recipient List”.
Add a greeting line (03:31)
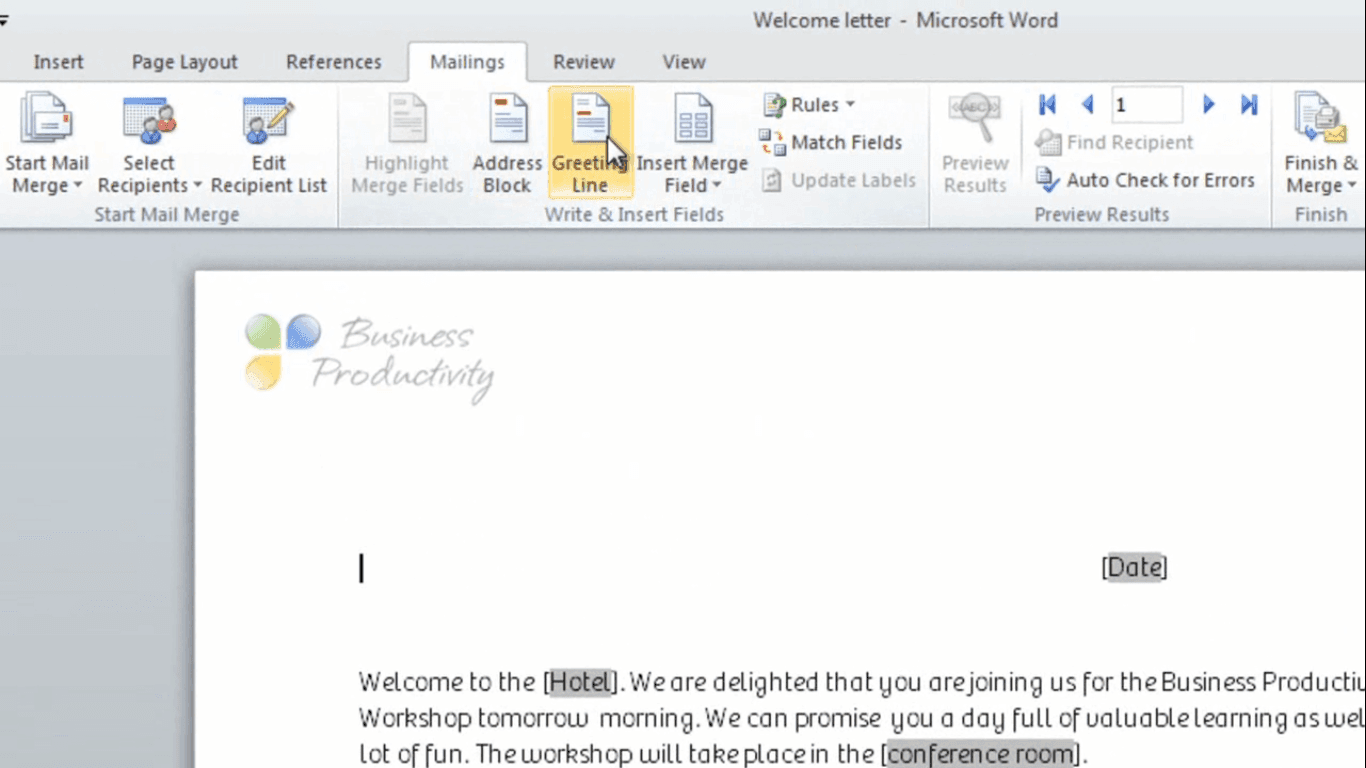
Now I’ll start adding our fields. First I want to add the greeting and the first name. So I’ll just delete this [the placeholder text] and I’ll go to the section called “Write & Insert Fields” and select “Greeting Line”.
Here I can select a greeting line. I want to have “Dear” and then I just want to have a first name. So I’ll scroll down and just select first name. And then we’ll have a comma. I can also select which greeting line I want to have if the recipient name is invalid and I’ll just leave the default “Dear Sir or Madam”.
Here I can see a preview of my recipient list and it looks good so I’ll just click OK. And here I can see that Word has inserted the greeting line for me.
I can preview the result by clicking “Preview Results”.
And then I can step through each recipient. To close the preview just click Preview again.
Add variable text to your letter (04:25)
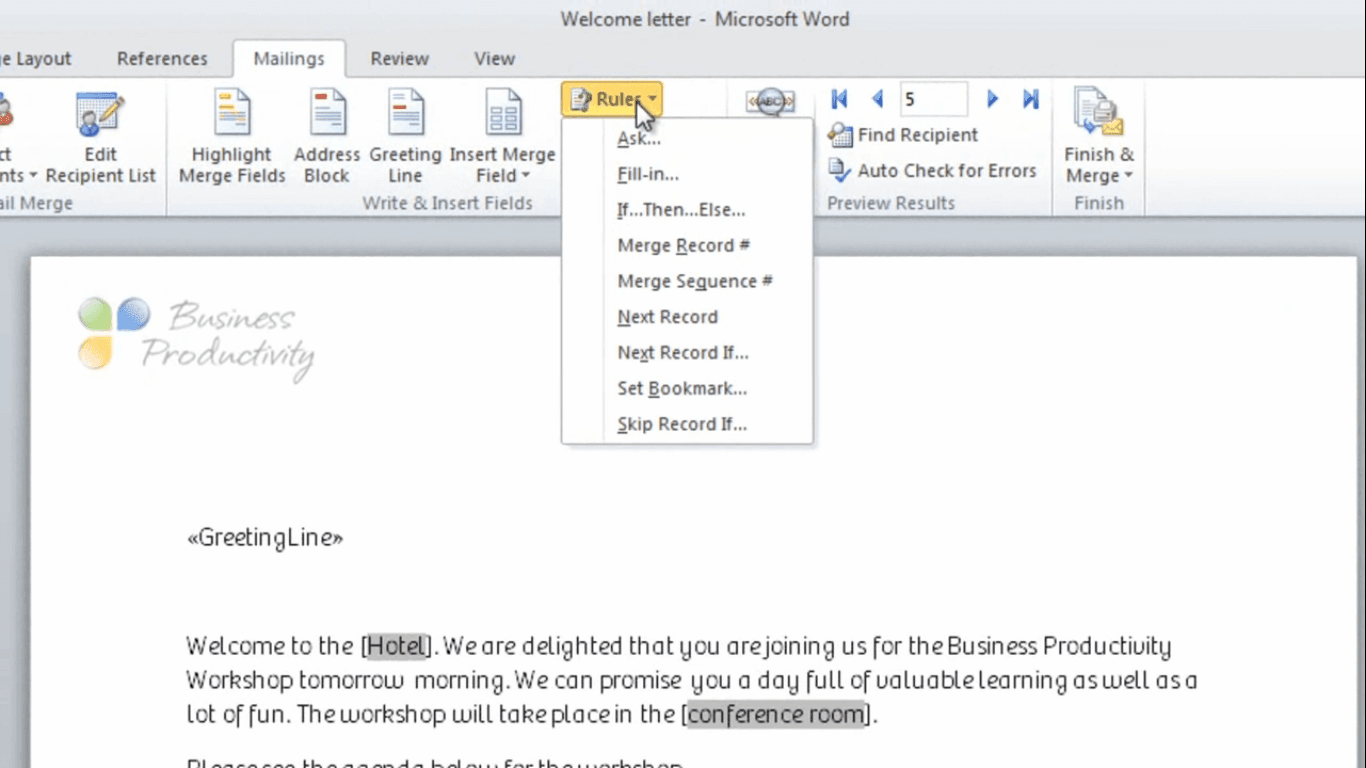
Next I want to insert the date. Since the letter date is going to change if we use this welcome letter at another workshop I want this to be flexible. To enable that flexibility I can add a rule to this letter template that says that each time we use this template we should ask the user for the letter date. To do that I’ll just delete the date here and I’ll click Rules.
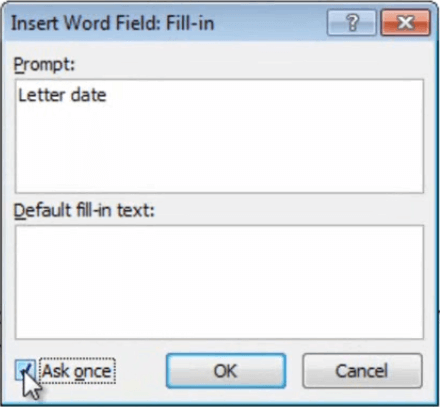
I’ll select “Fill-in…”. and then in the “Prompt” field I’ll just write Letter date. Here I can select to have a default fill-in text, but since we won’t have a default date I’ll just leave this blank. Here I’ll select to only ask once, since the date should be the same for all the recipients.
And then I’ll click “OK”. And for this welcome letter the date should be April 3rd, the day before our workshop. And I’ll just click “OK”. And as you can see, the date is inserted into my letter.
Now we’ll do the exact same thing for the hotel and the conference room. The only difference is for the hotel, we’ll leave the default value of Sofitel, because this is where we usually hold our workshops. So again I’ll remove my placeholder text and prompt to fill in the workshop location. I’ll put “Sofitel” as the default value and just click “OK”. I’ll do the same for the conference room; remove the placeholder, “Fill-in…” and prompt for the conference room for the workshop. And here I’ll put “Ballroom on the 3rd floor” and click “OK”.
Add text based on a specific criteria (05:56)
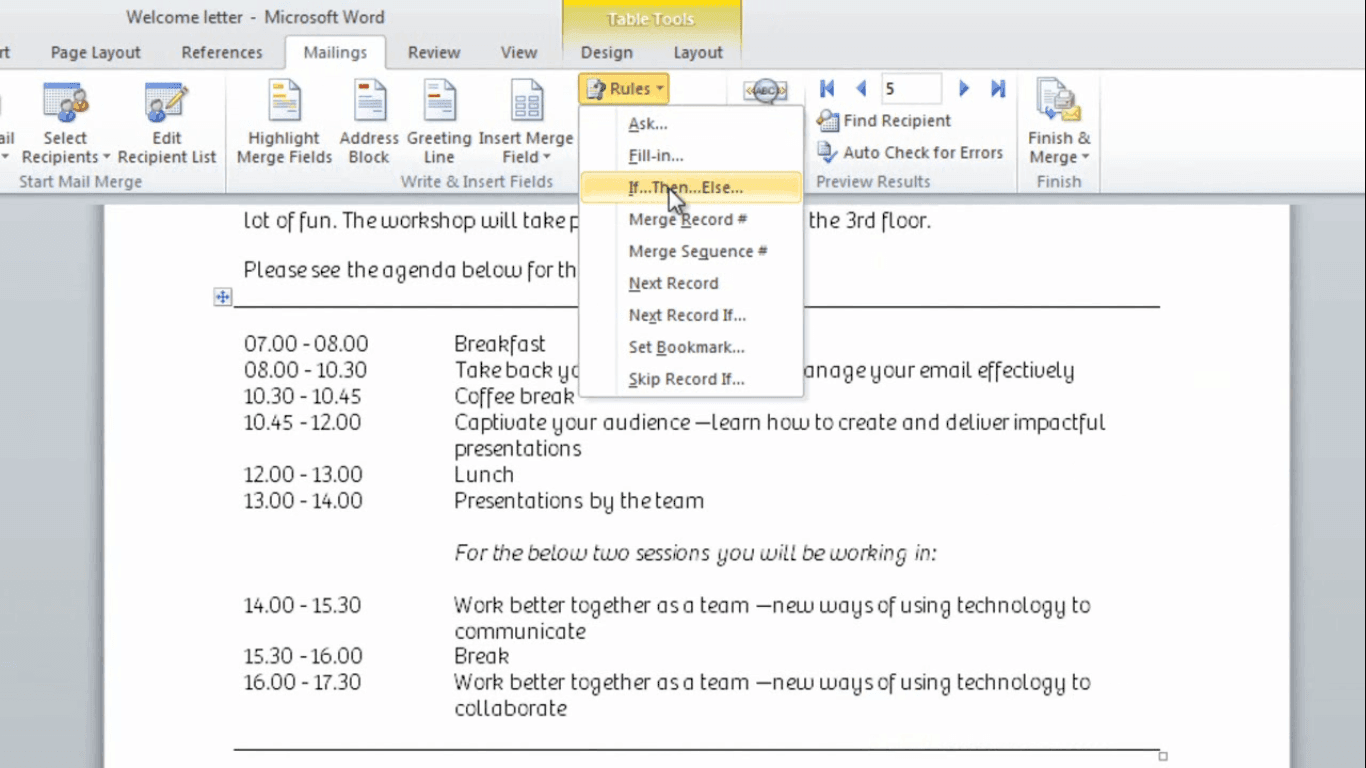
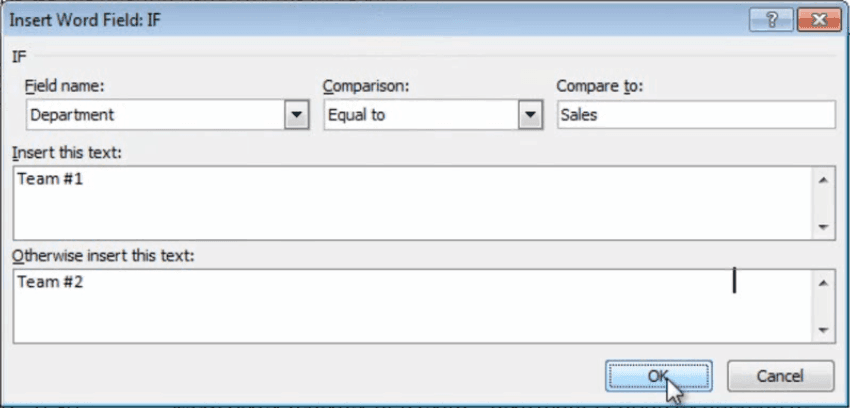
The final field I want to add to my letter is the team number. Everyone in the sales department should be in team number 1 and all other should be in team number 2. Again I’ll remove my placeholder text click “Rules”. And here I’ll select “If…Then…Else”.
I’ll say if the department is equal to Sales, then insert this text; “Team #1”. Otherwise insert “Team #2”.
And now click “OK”. You can see that Team #1 has been inserted here. I’ll just go to the “Home” tab and change the formatting so that it’s consistent. Now I’ll go back to the “Mailings” tab and select to preview the results. Now I can step through each of the recipients to make sure that the team number updates accordingly.
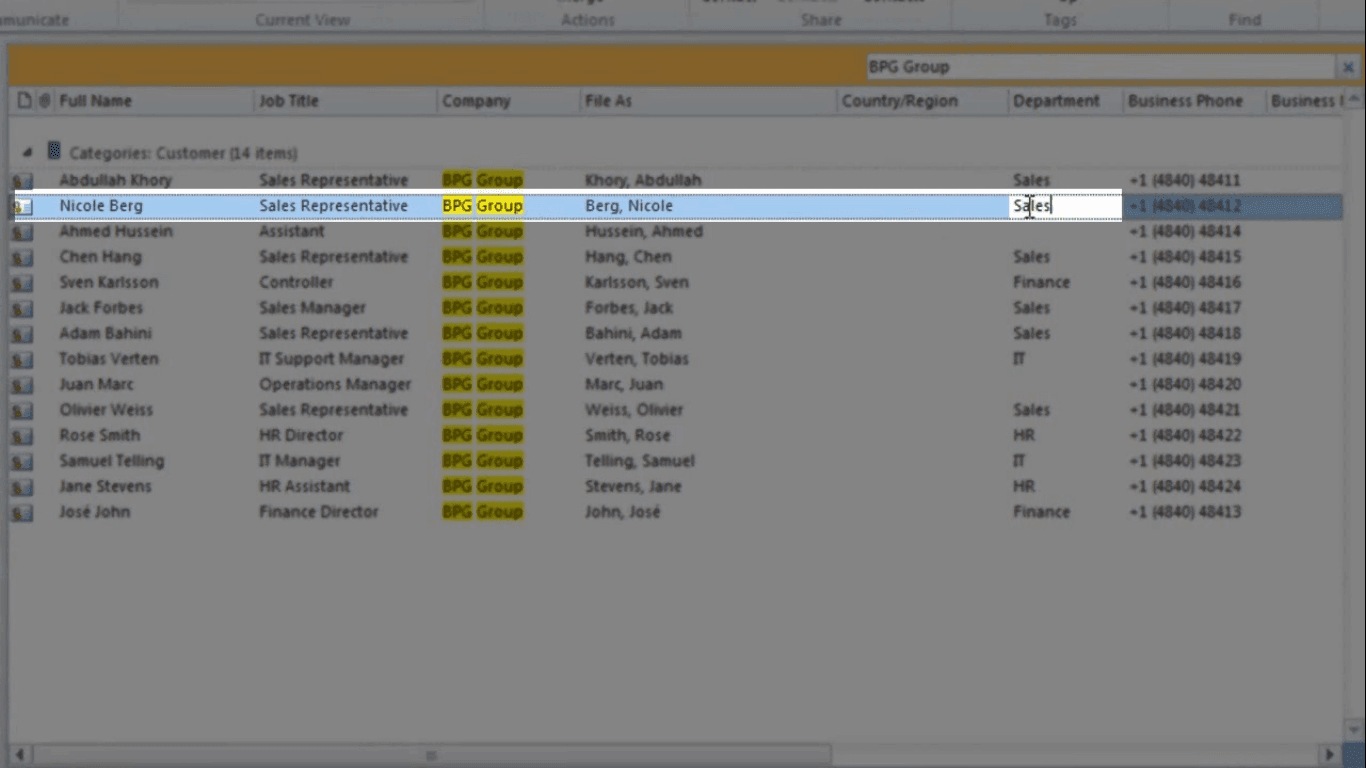
Since I don’t know which department everyone belongs to I’ll just open up the recipients in Outlook. I’ll do a search for BPG Group and now I can see the department. Right away I can see that Nicole, who’s a sales representative, should be in the sales department, otherwise the list is OK.
Refresh your recipient list if you make changes to your contacts in Outlook (07:11)
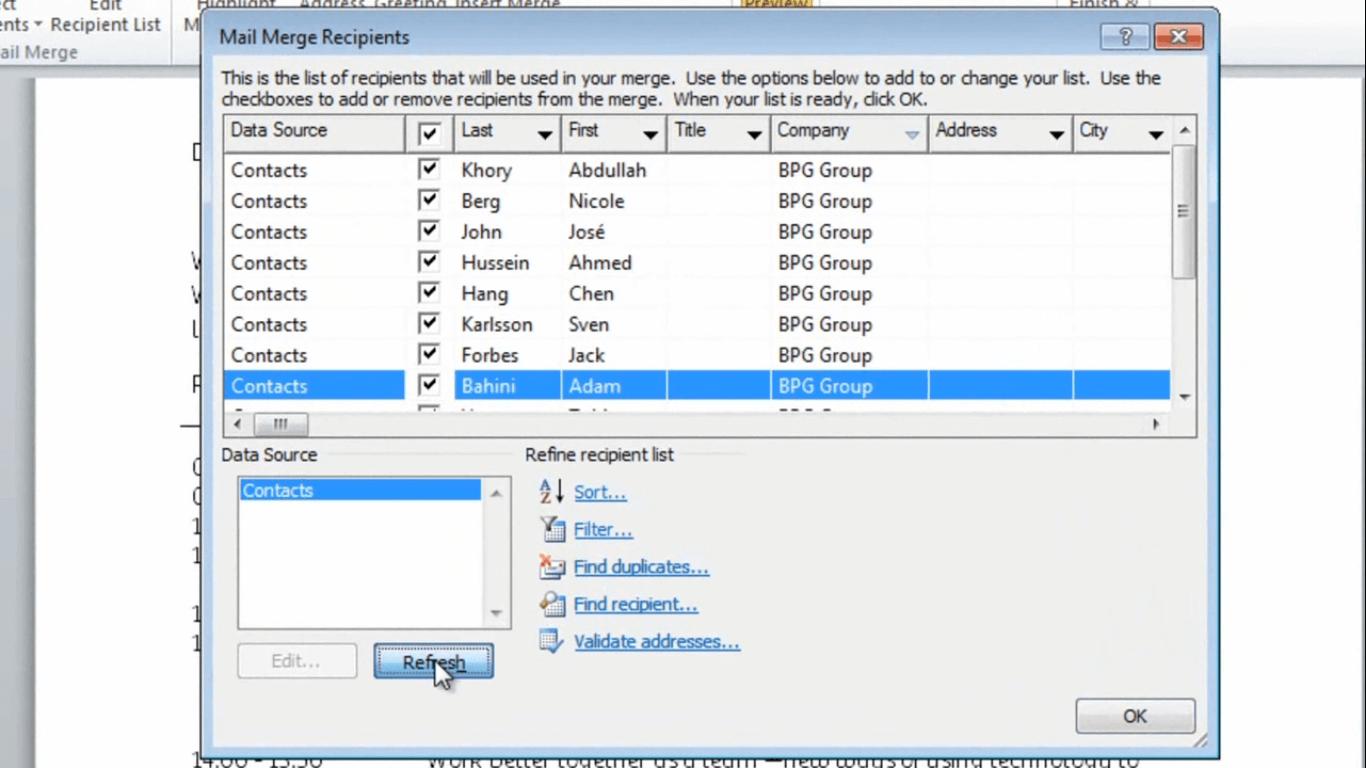
If I make changes to the recipients I need to update my data source so I’ll click “Edit Recipient List”, select my data source and then just click “Refresh”.
And then “OK”. Now I want to check on Nicole and she was number 2 and here she is in Team #1. Perfect! Now everything is correct!
Finish the letter (07:35)
Now I’m done with the welcome letter and I’ll just click “Finish & Merge”. Here I can select between three different options; “Edit Individual Documents”, this will create a document where each page will be an individual letter. I can select “Print Documents”, this will send the letters directly to the printer, but I won’t have the option to save the documents as reference. And then finally to “Send it as an email message”.
I’ll click “Edit Individual Documents” because I want to review all of the letters before we print them. Again, I’ll just confirm the input data. And now I have a long document where each page is a unique letter. When I have reviewed the letters and I’m happy with the outcome I’ll just print the letters.
Closing (08:22)
Mail Merge has been available in Word for many years, but it’s been overlooked by many. If you ever need to write multiple personalized letters Mail Merge is a great time saver that helps improve efficiency, it also adds more impact to your communication. I hope by watching this video you will know exactly what to do. I’m Ulrika for Business Productivity – thanks for watching!


