Collaborate on a project notebook
Learn how to use Microsoft OneNote 2010 for joint note taking
Introduction (00:04)
Welcome to Business Productivity – I’m Ulrika Hedlund. When you’re collaborating on a project or an initiative you need to share a lot of information with each other. This might be project plans, action items or other documents related to the project. Using a SharePoint team site is great for sharing information with each other.
But quite often you want to share unstructured information with each other. This might be information from brainstorming sessions, research from various web sites, or meeting minutes from your many project meetings.
In this video I’ll show you how you can use Microsoft OneNote 2010 and SharePoint in Office 365 to create a shared project notebook, where you can share all of this unstructured information with each other. I’ll show you how you can invite team members to the shared notebook, how you can collaborate on notes in real-time and also how to stay up to date to all the changes that have been made to the notebook. Let me show you!
A SharePoint project workspace (01:09)
We’ve kicked off a new project called web site 2012 where we are working on the next generation of our web site. Here we have our SharePoint team site for the project where we share important information with each other. Here we have structured information such as project documents, a Project Calendar, Project tasks, expense tracking and so on. Now I want to add a shared project notebook so that we can share more unstructured information with each other.
First I’ll create a document library where we can store our notebook. Click “Site Actions” and then “New Document Library”.
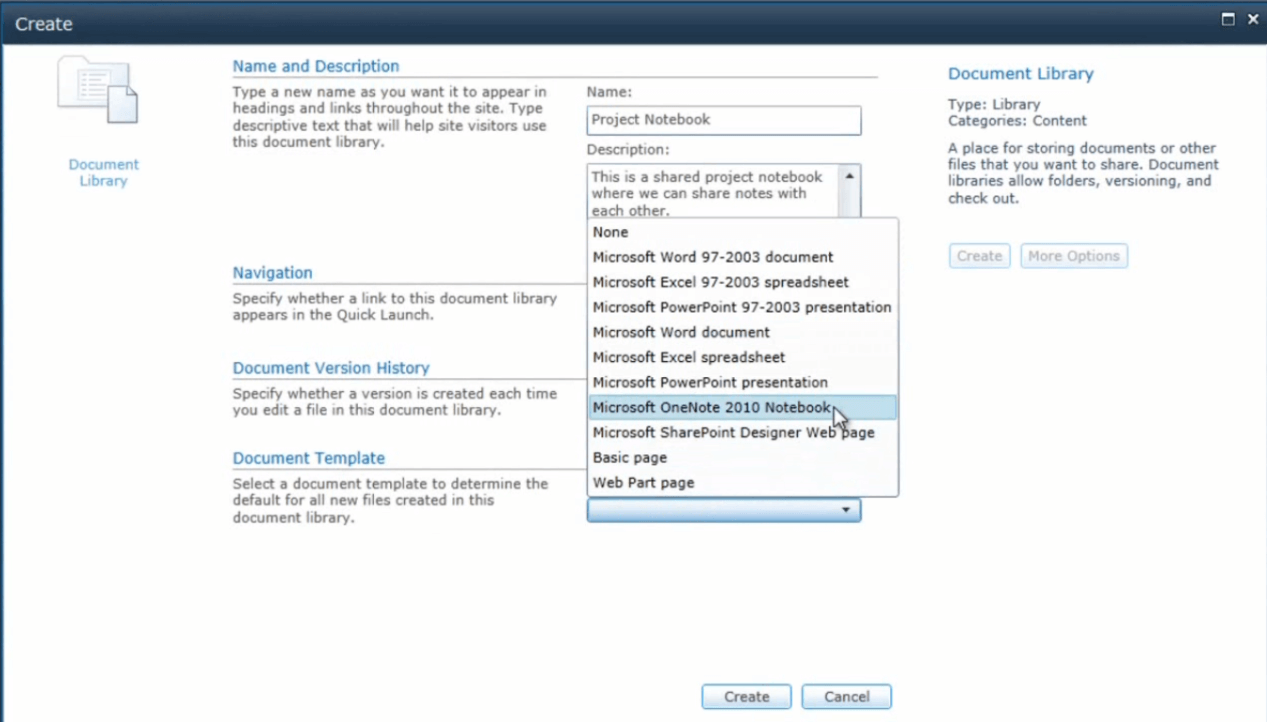
Here you give your document library a name and I’ll just name this “Project Notebook”. And then you can write a short description; “This is a shared project notebook where we can share notes with each other.” I’ll change the document template to a Microsoft OneNote 2010 document and then click Create.
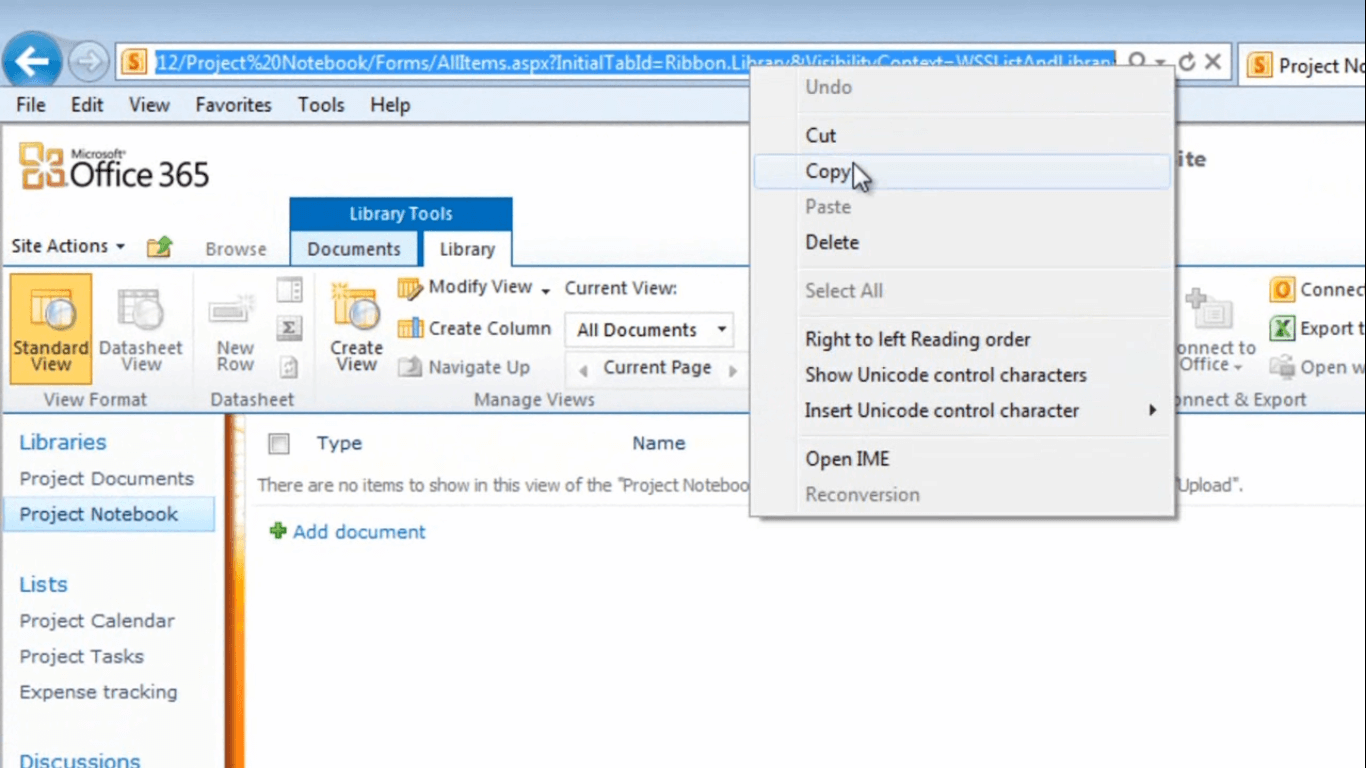
A new document library has been created. So what I’ll do is that I’ll just copy this link and later we’ll put that into OneNote.
Create a shared notebook (02:14)
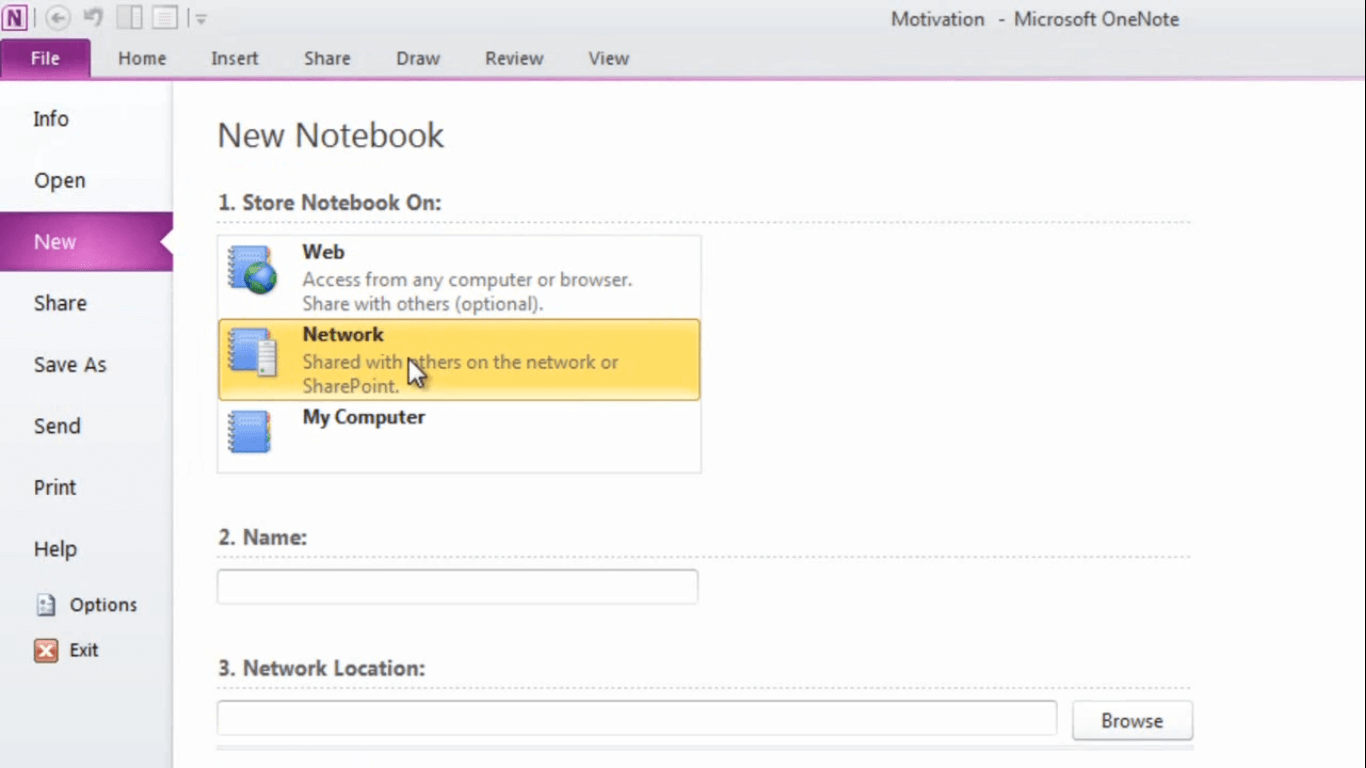
Now let’s open up OneNote to create a new shared project notebook. To create a new notebook click File, New and then under “Store Notebook On” select “Network”.
This can either be file share or as in our case a SharePoint document library. Write a name for your notebook and I’ll just name it: Web site 2012. In the Network Location I’ll paste in the link that I just copied to our document library. I’ll remove the last part of the address and only keep the part that points to the document library.
And then I’ll click Create Notebook. A new notebook that is saved and synchronized to our Project Team site on SharePoint is created. I’ll get a message informing me that everyone who has permissions to view the document library also has permissions to see this notebook, I’m also asked if I want to send out an email invitation to my team members. Before I send out an email though I want to add some notes to this Notebook so I’ll just click No, thanks.
Add notes to the shared notebook (03:22)
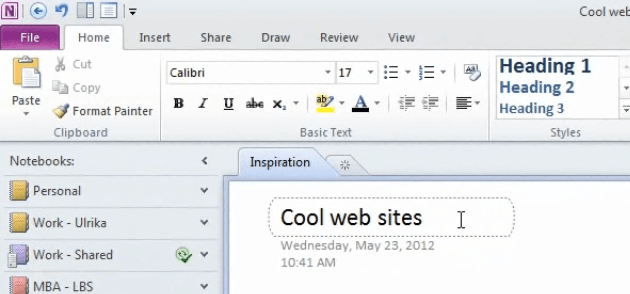
I’ll rename this Section Tab that has been created for me to “Inspiration” and I’ll name this first page “Cool Web sites”.
Here I want to add screenshots of some of my favorite web sites and share them with my team. I’ll open up the Apple web site, which I love for its clean and simple design, and then I’ll go to OneNote. I’ll click the “Insert” tab and then select “Screen Clipping”,
I’ll mark the page and insert it into OneNote.
I’ll add some more web sites and then I’ll also add sections for Technical Specifications and Web Agency Designs. All the changes I make in the notebook are synchronized so that everyone accessing this Notebook can see them. I can check the synchronization status by clicking on this Green Circle.
Here I can see that my notebook is up to date. If I go back to our Project team site in SharePoint you can see that the Notebook called “Web Site 2012” has been added to the document library we created.
Invite team members to the notebook(04:31)
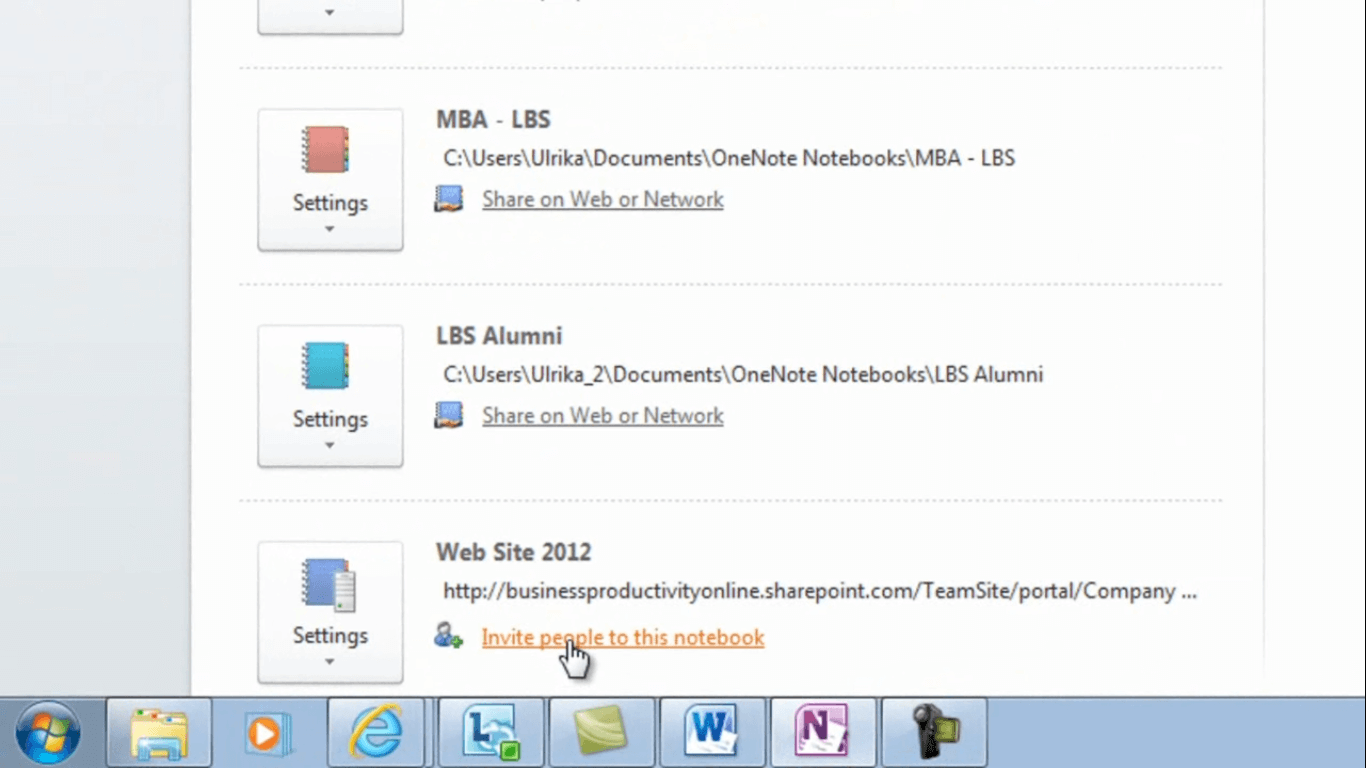
Now I’m ready to share the link to this notebook with the core project team. I’ll open up OneNote, click File, scroll down to the Web Site 2012 notebook and then click “Invite people to this notebook”.
Here I’ll click “Email others about this notebook”. An email message is created for me with two links to the notebook. The first link opens the notebook up in Microsoft OneNote, the other one opens up the notebook in the browser. This is a great option if you are travelling and want to access the notebook from any PC with an Internet connection.
I’ll add my project team members to the email, compose a message and then click “Send.” Now let’s switch over and pretend that we’re Jacob to see this from his perspective.
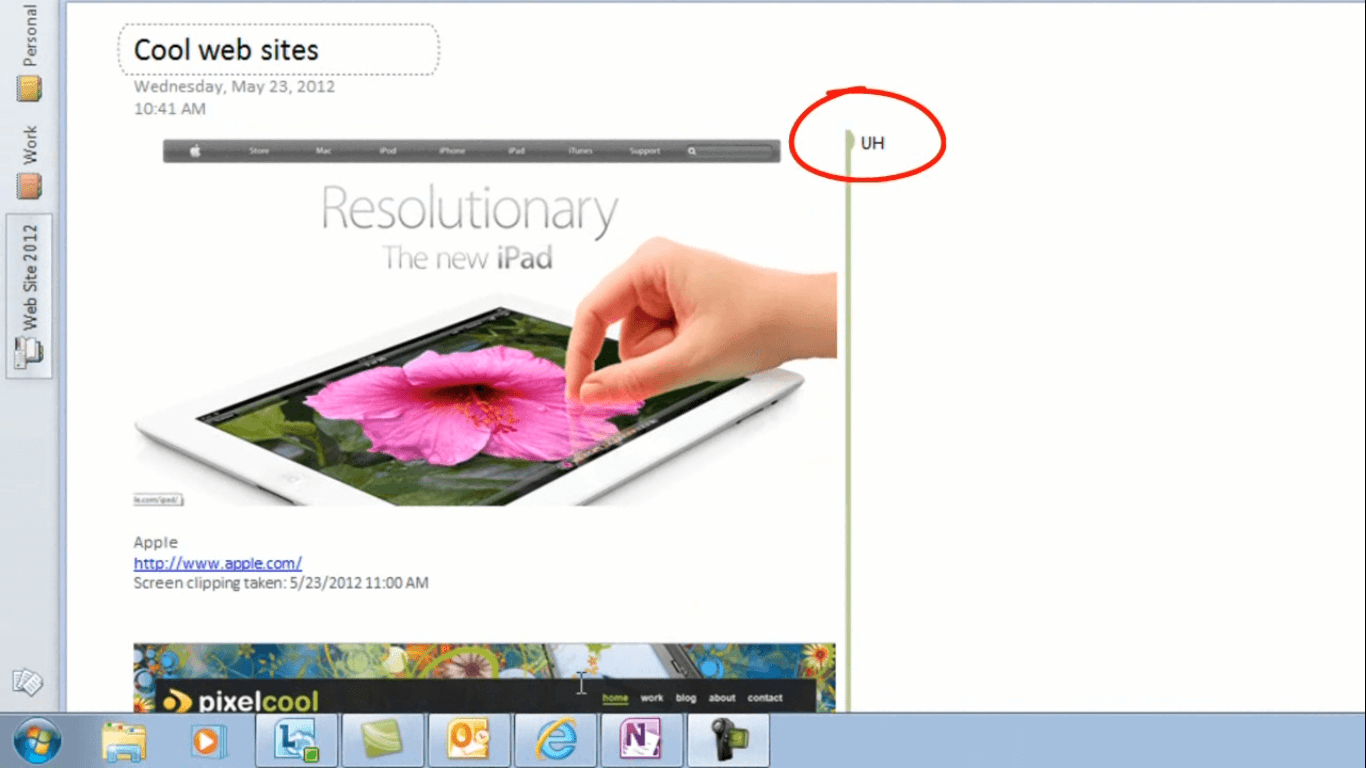
Jacob has received the email with the Notebook invitation. If he clicks on the first link the shared project notebook opens up in OneNote. Here he can see that the notes that I have added are marked with my initials; UH.
If he clicks the other link, the notebook opens up in the browser. Even though the OneNote Webb App isn’t as rich in functionality as the desktop application, it’s still very useful to be able to access the notebook from anywhere.
See what your project members have added (05:58)
Now I’ll log in as myself again and open up OneNote. The turning green circle indicates that the shared project notebook is synchronizing changes to my PC.
When it’s done I can see that some of the section titles and page titles are bold. This means that there are changes in this notebook that I have not yet seen.
If I scroll down on this page I can see that Jacob has added some additional screen clips of inspirational web sites. Everything that he has added has been highlighted in green.
I can mark the notebook as read and remove the highlighting by clicking the “Share” tab and then click “Mark as read”. This way the bolding of the headings and the green highlighting will disappear. Only Jacob’s initials remain.
Collaborate on notes in real-time (06:48)
Here’s an instant message from Peter, he’s asking me if I have 10 minutes to help him come up with some topic names for our web site navigation. I’ll just say; sure, and also let him know that Jacob has created a page for this in our shared notebook.
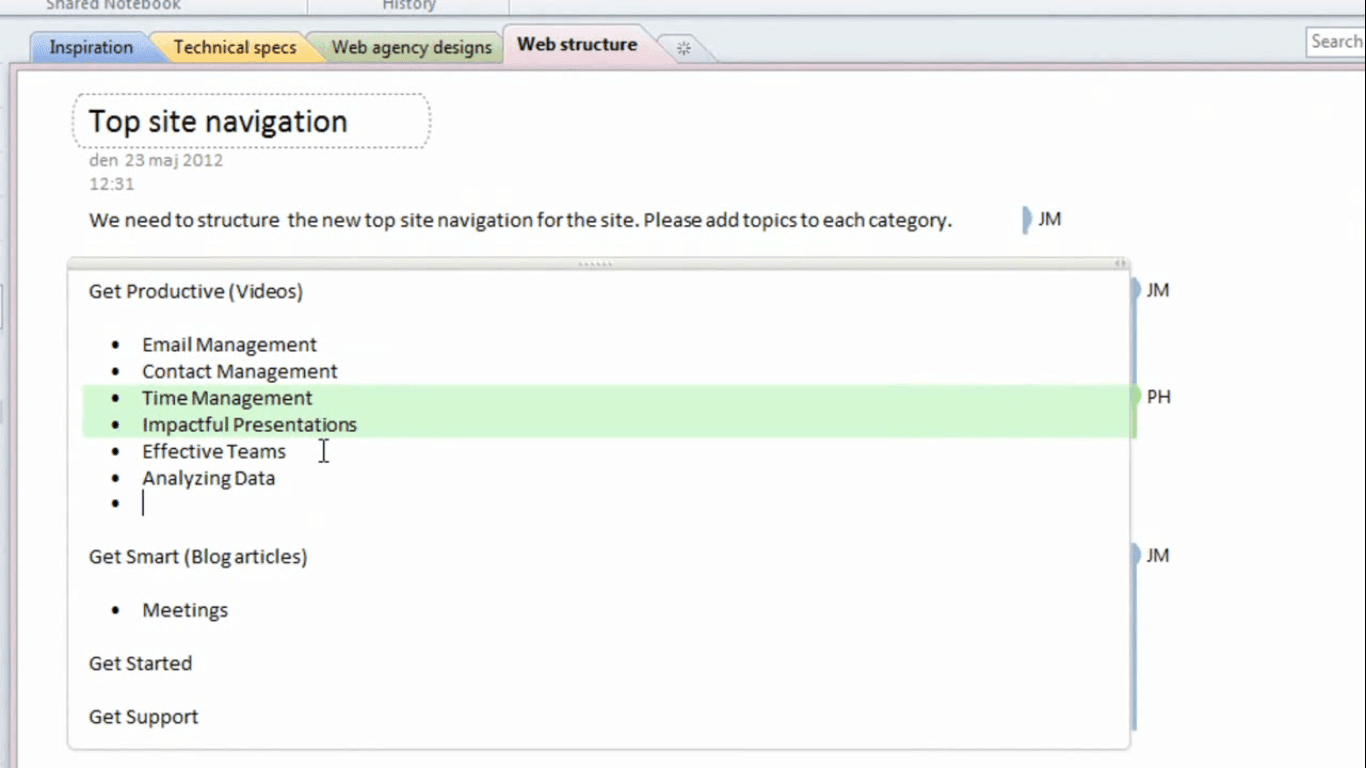
When you have a shared notebook multiple people can add notes at the same time. Here I can see that Peter’s added some topics and I’ll just add some as well. This is a great way of collaborating in real-time.
Again, to remove the highlighted changes; just click “Mark as Read”.
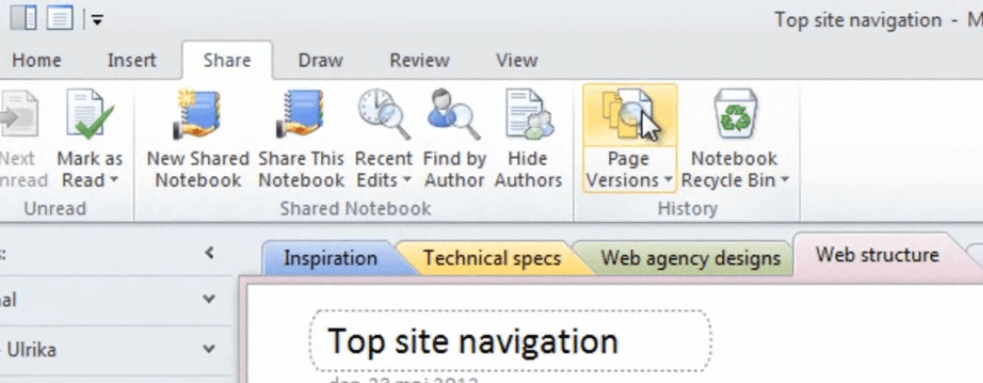
Sometimes you might want to go back and see what a page looked like before any changes were made. To see previous versions of a page, click “Page Versions”.
Here you can see the dates and who made a change to the page. I can select the original page created by Jacob and if I want I can select to restore this page [“Restore Version”], alternatively I can copy it if I want to keep both versions [“Copy Page To…”]. Since I’m happy with the one we currently have I’ll just choose “Hide Page Versions”.
Closing (08:03)
Using a shared notebook in Microsoft OneNote 2010 is a great way of sharing information with your team. This way you can have everything related to the project gathered in one single place, and if a new team member joins, he or she can quickly get up to speed. It’s also a great way of making sure that everyone in your team is on the same page! I’m Ulrika Hedlund for Business Productivity – thanks for watching!


