
Fine-tune your inbox to save time
Introduction (00:04)
Having a system in place with a proper folder structure is critical when it comes to effectively managing email. In addition to that, there are a number of things you can further do to optimize the way you manage your email. In this video you will learn how to use search folders, rules and how to eliminate email distractions all together.
Adding multiple email accounts to Outlook (00:25)
Most of us have more than one email account. In addition to my work email I have a personal email account that I use for communication with family and friends. I access this account via the web site Outlook.com. I also have a business Gmail account that we use for our YouTube channel that I access through Google’s Gmail site. Having to switch between different email web interfaces is very time-consuming. To remediate this, you can add multiple email accounts to Outlook. To add an additional account go to the “FILE” tab and click “Add Account”. First I’ll enter the details of our business Gmail account, I’ll enter our business name, email address and then the password twice and then click “Next”.
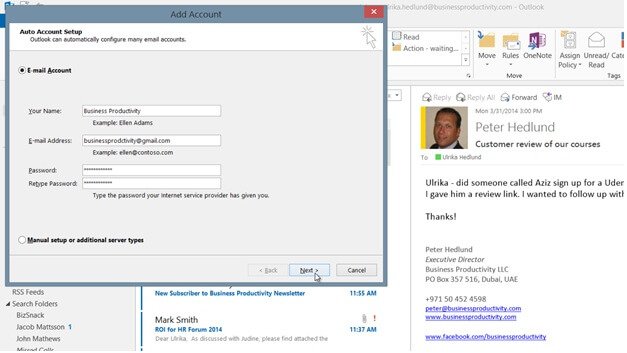
Outlook connects to the Gmail service and uses the credentials I entered to log in. I’ll click “Finish” and now as you can see if I scroll down in my folder list the Gmail account has been added to Outlook. I’ll do the same thing again and add the login details for my personal live.com email account.
In Outlook 2013 you don’t’ have to install any add-ons to connect to Hotmail or Live email accounts. You can also add multiple Exchange email accounts to Outlook 2013 which wasn’t possible in previous versions of Outlook. There, now I have access to all my email accounts and I can receive and send emails from all of them without leaving Outlook.

Adding folders to the Favorites View (02:07)
If you have a lot of mailboxes it can help to add the most important folders to your “Favorites” list so that they are easily accessible.
To add a folder to your Favorites, just right-click the folder and select “Show in Favorites”.

I recommend that you add all Inbox folders to your various email accounts to your Favorites list. Make sure that your main business email inbox is at the top. In addition to the Inbox folder it’s good to add the “Action” folder (if you have one) for your main business account to your favorites list. Re-arrange your favorites list so that the Action folder is right under your business email account inbox.
Configure Outlook to always open up showing your Action folder (02:50)
You Action folder is your most important folder.
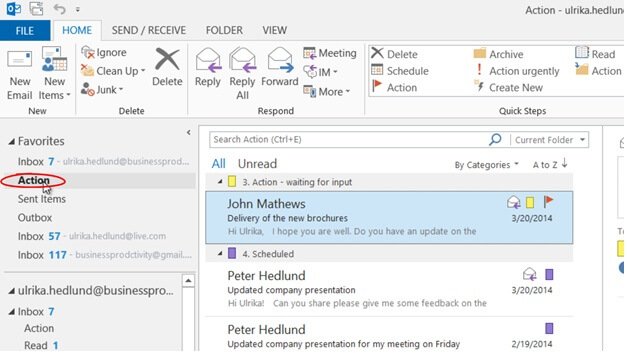
If you are always looking in your Inbox folder you might lose track of the email you need to action. In addition to adding your “Action” folder to your Favorites you can add more focus to your Action folder by showing it every time you open Outlook. To configure Outlook to show your “Action” folder at startup, go to the “FILE” tab, click “Options”, “Advanced” and where it says “Start Outlook in this folder” click “Browse” and select your Action folder.
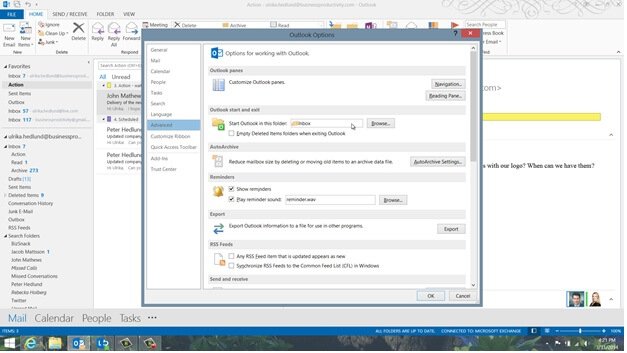
Click “OK” and again “OK” to apply the changes. Now every time you open up Outlook you will see the email you need to action. Use this view to keep track of the email you need to follow up on and only go to the inbox when you’ve scheduled time to do email.
Remove email distractions (03:42)
With the number of email that we as business professionals receive every day, it’s easy to get distracted by all the email notifications that pop up on your screen. In order not to lose valuable work time due to distractions, I recommend you turn them off. To turn off the notifications in Outlook, go to the “FILE” tab, go to “Options” and click “Mail” and then scroll down to the “Message arrival” section. Here I’ll uncheck all of the notification options. And then I’ll click “OK”.

If you are using Windows 8, Outlook notifications are grouped into the general Windows notifications so you need to turn them off in Windows. To do this, open up the Charms menu by moving your mouse pointer to the bottom right corner of your screen, or swipe the screen from the right if you have a touch-screen. Select “Settings”, “Change PC Settings”, “Search and Apps”, “Notifications” and then scroll down to the listed apps and turn off the Email notifications, I’ll do it for the Windows Mail application as well as for Outlook.

Then I’ll close the settings by pulling the window down. There, now you can focus your attention on your work.
Save time by creating rules (05:03)
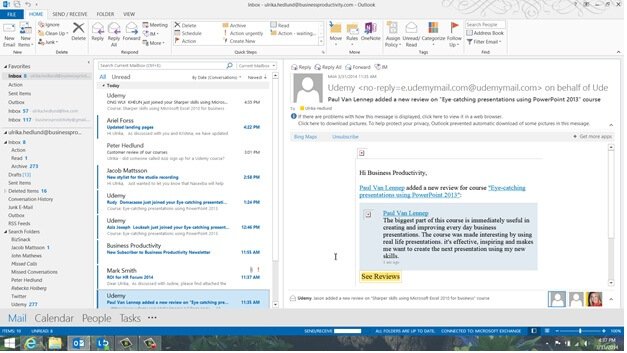
Another way in which you can fine-tune your inbox to save time is to create rules. Rules can take care of email for you, if a defined criteria is met. Let me show you an example. I get numerous email every day from the course platform Udemy when a student signs up for one of our courses. I want to keep this information in my Archive folder as a reference, but I don’t want to manually waste time going through every email, so I’m going to create a rule that does this for me.
If you always want to move email from a specific sender to a specified folder you can just right-click the email, click “Rules” and choose “Always Move Messages From” to the specified folder.

But in this case I need to make some adjustments to the rule since I only want to move the email informing me about student enrollments so I’ll click “Cancel” here.
Here for instance I have an email from Udemy with a student providing feedback on a course and this I want to make sure to read.
To create a rule from scratch, I’ll mark the email I want to apply the rule to and click “Rules” on the “HOME” tab. I’ll click “Create Rule” and a window opens up with different options for this rule. Some fields are pre-populated with information from the email I marked. I’ll mark to apply this rule to email coming from Udemy, then in the “Subject contains” field I’ll remove the text and only keep “just joined” since the email I want to apply the rule to contain this text in the subject field. Then I’ll select “to move the email to my “Archive” folder.

If you want to add even more advanced options to your “Rules” you can click “Advanced Options” to open up the Rules Wizard. But for most rules the options you have available here are enough. I’ll click “OK” to apply the rule and here I’m given the option to run the rule now on the email in my inbox, I’ll mark it and then click “OK”. And as you can see the email from Udemy informing me of students that have just joined have been moved to my “Archive” folder but the email with other subject lines remain.
Search folders (07:18)
Quite often you want to gather email related to a certain topic, or from a certain person together so that you can get a quick overview of those email. Since it’s not productive to create and manage multiple folders you can use “Search Folders” instead. A Search Folder isn’t a physical folder with email, it’s just a filtered view of the email already in your inbox – kind of like a search. You can create Search Folders for email from specific people or related to a project, partner or customer.
Here I have an email from Peter asking me if Aziz signed up to the review of our PowerPoint course. Instead of going to my “Archive” folder and doing the search for Udemy and Aziz I can just go to my Search Folder I’ve created that contains email from Udemy, and here I can quickly see that Aziz has indeed signed up. You can delete Search Folders without deleting the actual email. To delete a Search Folder right-click the folder and delete.
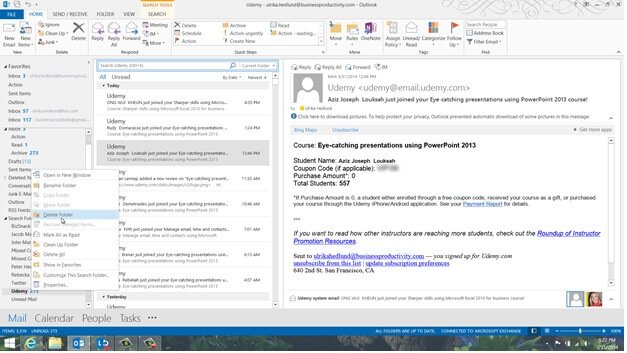
I’ll get a notification asking me if I want to delete the folder and I’ll click “Yes”.
To create a new Search Folder I’ll right-click ”Search Folders” and select “New Search Folder”. Here I can select from a number of predefined criteria, like email from a specific person or email flagged for follow up. At the bottom you can select to create a “Custom Search Folder”. Click “Choose” to define your options.
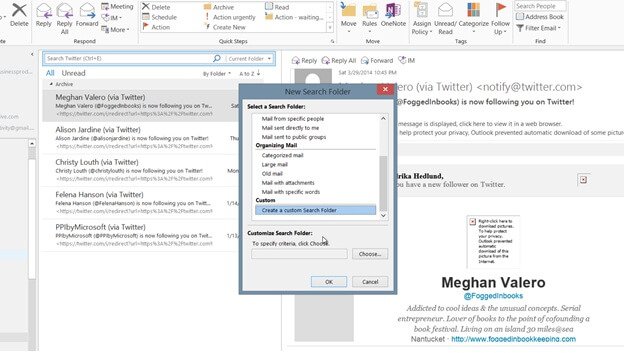
Here I’ll name the search folder “Udemy” and then click “Criteria”. In the “From” field I’ll type Udemy. Now all email from anyone who has Udemy in their email address will appear in this Search folder.

I’ll click “OK” multiple times to create my Search folder. You can sort your Search folder by physical folder so that you can see where the actual email is located, or to see the email in the order they arrived just change the sort order to “by Date”. The great thing about “Search Folders” is that you don’t have to manually maintain them, they are automatically updated.
By following these steps to fine-tune your inbox, I’m sure you will save a lot of time on email every day.