
Increase visibility by sharing your data
Learn how import your Excel spreadsheet into SharePoint to share your data
Introduction (00:03)
Welcome to Business Productivity, I’m Ulrika Hedlund. Most people I know use Excel to manage their data – customer lists, project issues, sales opportunities, you name it! We love Excel’s ability to sort and filter. Many times we need to share our data with others and this is frequently done by just attaching our Excel spreadsheet in an email. The problem with emailing spreadsheets around is that you have to send a new email every time you update your data. And what happens if someone else wants to add something to your Excel spreadsheet?
In this video I’ll show you how you can import your Excel spreadsheet into a SharePoint list to share it with others. This way they can easily get access to the latest version of the data and also they can add new items without a problem. Let me show you!
Import an Excel spreadsheet into SharePoint (00:59)
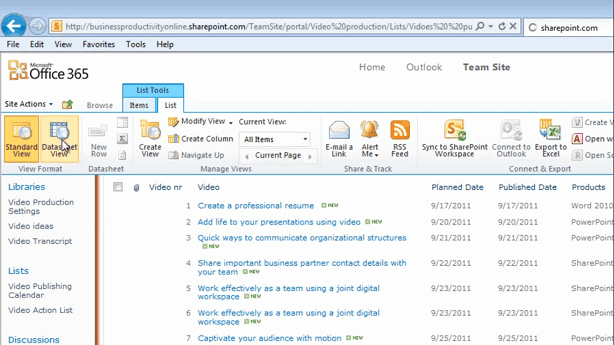
Here I have an Excel file with videos we’ve produced. I have one column with the names of the videos, planned and published dates, one column with the products covered in each video and finally the topic of each video. Our entire team needs to have access to this file to add information. Instead of having this in an Excel file I’m going to import all of this data into a SharePoint list so that everyone can easily have access to the information and also add new data.
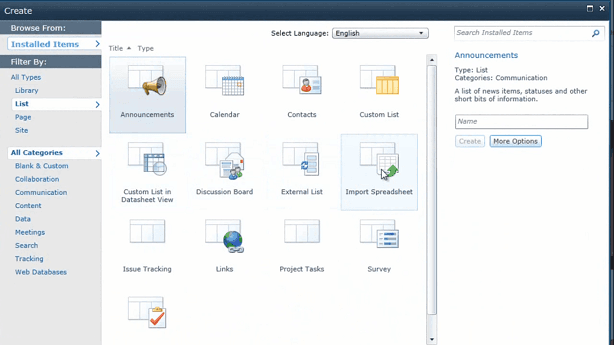
To do that I’m going to close down this file and I’m going to open up my SharePoint team site. I’m going to click “Site Actions” and then click “More Options”.

Here I’m going to filter on “List” and then select “Import Spreadsheet” and then click “Create”.
I’ll write a name for my list; “Videos – published and planned”, and then a description; “Videos on www.businessproductivity.com”. And then I’ll click “Browse” to upload my file. I’ll select my Excel spreadsheet and click “Open” and then click “Import”. When I click “Import”Excel opens up.So click here to open up Excel:
Now I get to select which data I want to import and this is honestly a bit confusing. If you have your data in a table like this you can select “Table Range” and then just select the table in the drop down list.
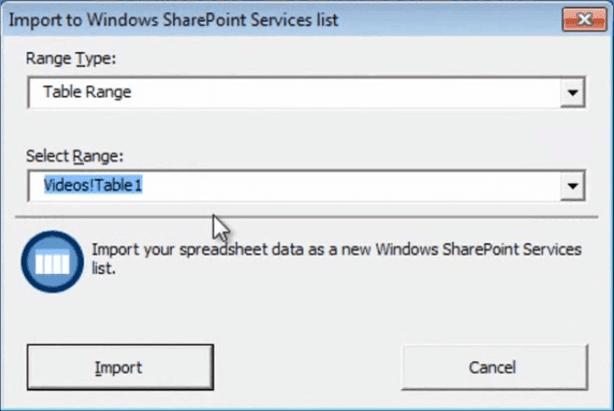
This selects your entire table and then you can just click “Import”. Now all of the data is copied from your Excel file and imported into the SharePoint library. This might take a while, so just please be patient – and here we are! All of the data from my Excel file has now been imported into this SharePoint list.
Edit your data like in Excel(02:50)
If I go to the “List Tools” tab and click “List” I can select to view this in a datasheet view.
This shows me the data, in a datasheet view, just like in Excel and I can edit the data just like I’m used to in Excel. If I click on the “Items” menu and then select “New Item” a form opens up where I can add new items to the list.

As you can see the date fields have given me a date picker so it’s easier for me to fill in the information. All the other fields are free text fields.
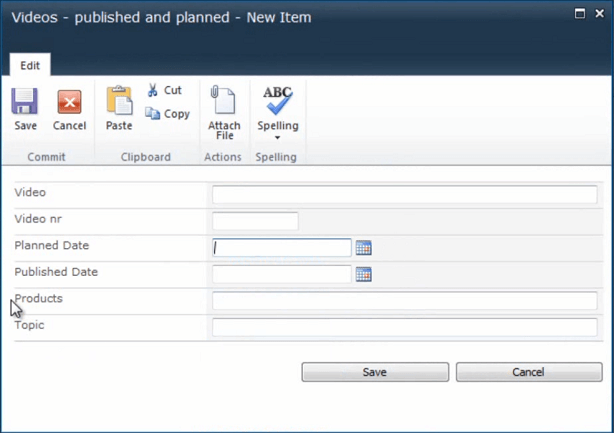
I’d like to change the last two fields, “Products” and “Topics”, so that instead of just being empty fields I get pre-defined options to choose from.
Simplify data entry by providing pre-defined options (03:33)
To do that I’ll click “Cancel” here, go back to my list and select “List Settings”.

Here I will scroll down to the columns field and I’ll select the “Products” column. Now I am going to change this from a “single line of text” to “choice”. The options are populated from my data, but here I only want to have each product once, so I’ll just delete some of them.

Okay! Now, since this field can contain multiple products I’ll select the “Check boxes”. “Allow ‘Fill-in’ choices” enables users to add a product that hasn’t been specified. And here I’ll select “Yes” and then I’ll just delete the default value, and then click “OK”. I’ll also change the “Topic” column. I’ll change this to a “choice” field and here [the choices] I’ll just leave the default. I want this to be a drop down menu. And again, I will allow “fill-in” choices. I don’t want a default value.

And then I’ll click “OK”. Now let’s go back to our list and see what the “New items” form looks like. I’ll click “Items”, “New item” and as you can see I now have check boxes for my Products field and for the Topic I have a drop down menu to select from.
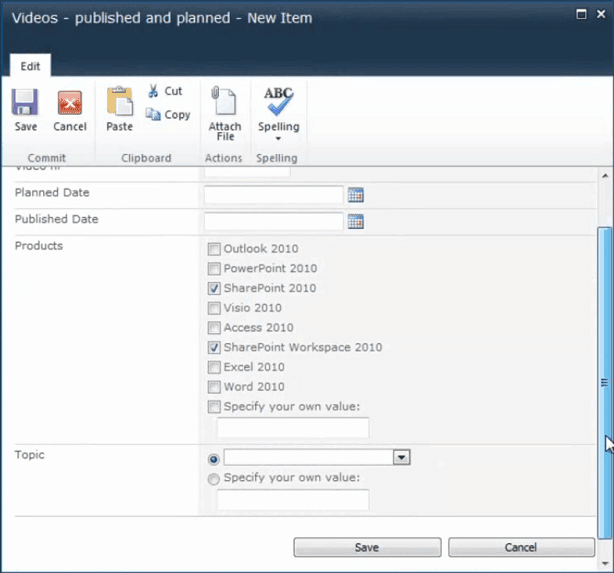
This really helps in preserving good data quality.
Changing data in the list(05:06)
If I want to go in and edit an existing item I can just click on the drop down menu next to the name and select “Edit Item”.
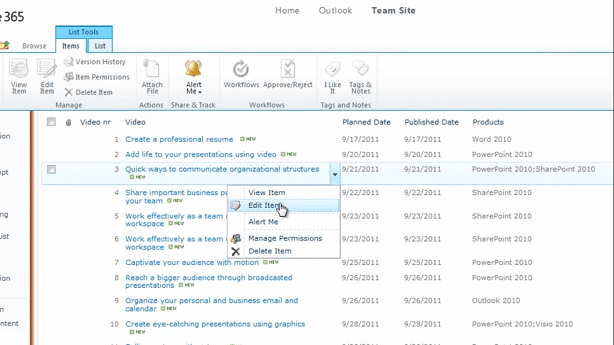
The form opens up and here I can make the necessary changes. For each item you can see when it was created and when it was last modified and by who. This is really useful if you are multiple people working on the same set of data.

Closing (05:31)
As you can see, this is a very quick and efficient way to share your data. It can also help maintain good data quality if you have multiple people involved in adding items to your list. What I show you here is only the beginning, when you have data in a SharePoint list you can manipulate it in multiple ways to provide new insights. But more on this in another video.
I’m Ulrika Hedlund for Business Productivity – thanks for watching!