
Personalize letters with Mail Merge
Introduction (00:04)
Even though most of our communication today is done via email there are still times when you want to send out letters. Whenever you write a letter, you should make sure that it’s personalized. Your readers will be much more inclined to read the letter if they feel that it’s addressed uniquely to them.
In this video you will learn how to use “Mail Merge” in Word 2013 to automate the process of personalizing multiple letters. You’ll also learn how to add some flexibility to your letter so that you can use the template multiple times.
Reviewing the final result (00:38)
On Nov 4th, we’re having a Business Productivity workshop for one of our customers. The attendees will be arriving to the hotel the night before the workshop. When they arrive, each of the 14 participants will be given this welcoming letter printed out on a piece of paper.
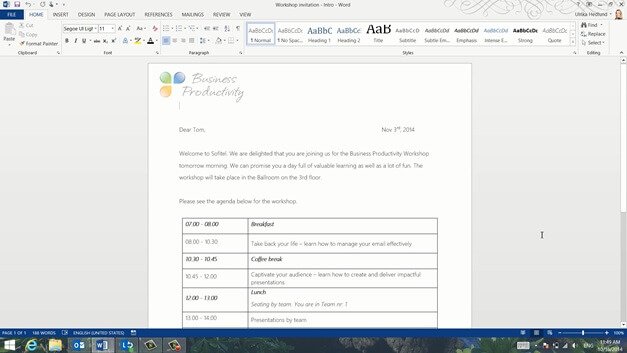
The letter will greet each participant by first name. The date of the letter should be the date before the event. The name of the hotel and the conference room where the workshop will be held should also be added to the letter. I could just write in the date, hotel and conference room into the letter, but since I want to make this into a re-usable template that we can use multiple times, I’ll add some flexibility here so that we can easily change this information next time we use the template.
Finally each of the participants will be assigned into a team, Team number 1 or Team number 2, depending on which department they belong to. So I’m going to add some logic into the letter to assign each participant to the right team.
Starting Mail Merge to personalize letters (01:44)
Here is the welcome letter in Word. I’ve highlighted the fields that will vary in yellow. To start using Mail Merge, go to the “MAILINGS” tab and click “Start Mail Merge”, here you can select what type of document you want to create or, if you want step by step guidance you can select the “Step-by Step Mail Merge Wizard”.

First you need to decide what the outcome should be of your Mail Merge, letters, e-mail messages, envelopes and so on. In this case I want to create personalized letters to print out, so I’ll select the first option which is “Letters”. The second step is to select starting document, and I’ll leave the default option which is “Use the current document”.
Selecting recipients (02:29)
The next step is to select recipients. You can select recipients from a number of different sources, you can use an existing list, like an Excel spreadsheet or an Access database, you can select recipients from your Outlook contacts or you can type them into a new list by hand.
I want to personalize letters to the employees of the company BPG Group that I have in my Outlook Contacts.
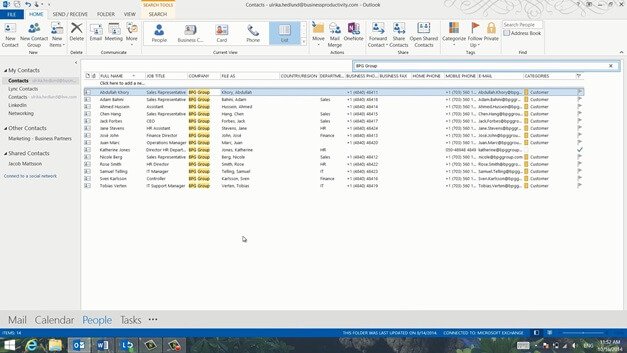
Since I’m going to filter on the company name, I need to make sure that all the contacts have the company field entered correctly. I’m also going to use the first name field, so I’ll check to see that I have the names of all people in my contacts.
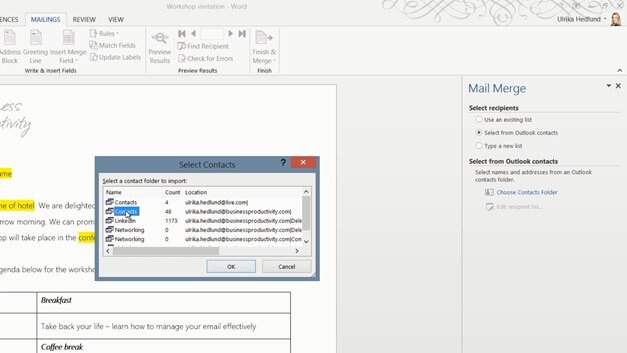
To select my Outlook contacts I’ll click “Select from Outlook Contacts”. Here I can select between the different contact folders I have in Outlook and I’m going to select my main contacts folder which is associated with my business email account. Then I click “OK”.
Here I’ll get all of the contacts that I have in my contacts folder and I only want to select the ones from the company BPG Group, so to do that I’ll click “Filter”. I’ll click the “Field” drop down and select “Company”. I’ll leave the default “Comparison” which is “Equal to” and then I’ll type in the company name in the “Compare to” text field and click “OK”.
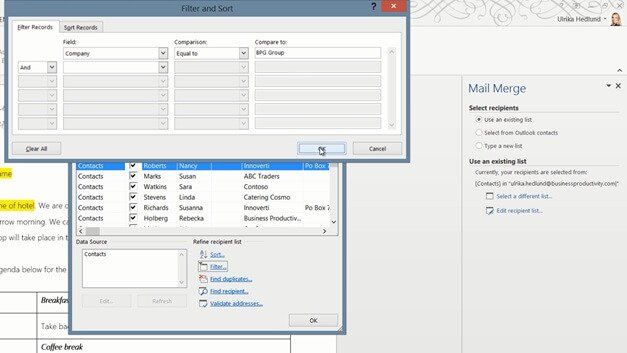
Now, only the contacts from the BPG Group will be selected for the Mail Merge. You can always go back and edit the recipient list at a later stage by clicking “Edit recipient list”.
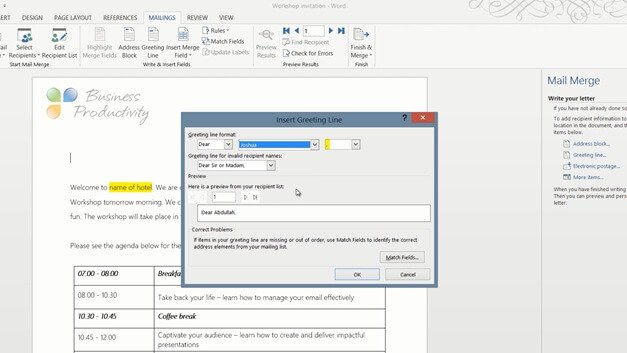
When I’ve selected my recipients I’ll go to the next step of the wizard which is to write the letter. First I want to add the greeting line and the first name. So I’ll just delete my placeholder text and click “Greeting Line”, either on the “MAILINGS” menu, or in the “Mail Merge” wizard.
Here I can select between different greeting lines. I select “Dear” and then the first name. So I’ll scroll down and select the first name. A comma is automatically inserted after the greeting line. I can also select which greeting line I want to have if the recipient name is missing and I’ll just leave the default “Dear Sir or Madam”. Here I can see a preview of my recipient list and it looks good so I’ll just click “OK”.
When a mail merge field has been inserted into your letter you will see the name of the field inside two tags. If you want to add additional fields from the contacts, such as the postal address or the e-mail address just click “Insert Merge Field” on the “MAILINGS” menu or click “More items” in the Mail Merge wizard and select the appropriate fields from the list.
If you want to see what the actual letters will look like when they are done, just click “Preview Results” and then you can step through the recipients in the list by clicking the back and forth arrows.
Using “Fill-in” Rules (05:23)
Next I want to insert the date. I want this to be flexible. I’ll click “Rules” and select “Fill-in”. In the Prompt field I’ll enter the text that I’ll be prompted to fill in when I open up this letter template. So here I’ll write: “Letter date”. I can select to have a default fill-in, but I’ll leave this blank. By default the Word template will automatically populate this with the latest used field anyway. At the bottom of the message box there is an option called “Ask once”. If I mark this check-box, the same date will be used for all letters without asking about the letter date for each one. Since the date should be the same for all letters I’ll mark the check box and then I’ll click “OK”.

I’m prompted right away for the letter date, so I’ll enter “November 3rd, 2014”. I’ll click “OK”, and as you can see, the date is inserted into my letter.
Now I’ll do the same thing for the hotel and the conference room, since these will likely change next time we have a workshop and want to use this letter. There now these fields have all been inserted into my document.
Using “If..then..else” rules (06:32)
The final field I want to add to the letter is the team number. Everyone in the sales department should be in team number 1 and everyone else should be in team number 2. I’m going to use the department field in the Outlook contact to determine the team number for each attendee. Here I can see that Abdullah, who is a Sales Representative doesn’t have the “Department field” filled out, so I’ll just update the department field in Outlook to “Sales”.

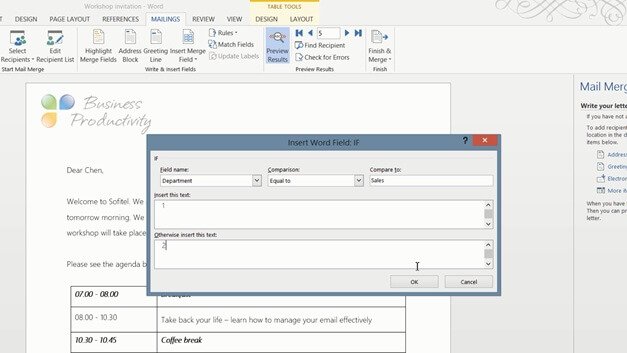
I’ll go back to the invitation letter and delete the placeholder text for the “Team nr” and click “Rules”. Here I’ll select “If…Then…Else”.
In the “Field name” drop down I’ll select “Department”, I’ll leave the “Comparison” as “Equal to” and then in the “Compare to” field I’ll enter “Sales”. In the “Insert this text” text box I will write the number 1. In the “Otherwise insert this text” text box I’ll enter the number 2. And then click “OK”.
If I scroll down, now you can see that the team number has been inserted into the letter. I’ll mark the number and change the formatting to Italic so that it’s consistent with the rest of the text. On the “MAILINGS” tab I will step through some of the recipients to make sure that the team numbers are assigned correctly.
Editing individual letters/documents (07:54)
Now I’m done with the welcome letter. I’ll step through the remaining steps in the Mail Merge Wizard, I’ve already previewed my letters so I’ll go to the 6th and final step which is to complete the Mail Merge. Here you can select between “Print” and “Edit individual letters”.
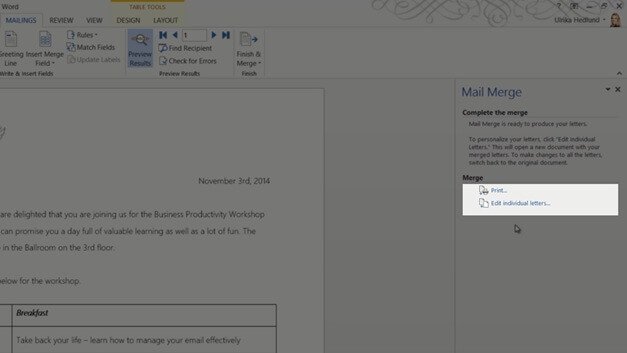
If you select “Print”, this will send the letters directly to the printer, you won’t have the option to save the individual letters as a reference. Instead I recommend that you select “Edit individual letters”.
If you are not using the Mail Merge Wizard, you can accomplish the same thing by clicking “Finish & Merge” and selecting “Edit individual Documents”. I’ll select this option and here I can select if I want to generate a selection of the recipient letters or all of them. I’ll select “All” and then enter the fields that I’m prompted for.

The result is a 14 page long document with a unique page for each recipient. I’ll click “FILE” and “Save” and then I’ll save this document for future reference. Unfortunately there is no option here to create the letters as individual files, which might be useful if you also want to email a welcoming letter to each recipient.
Saving and re-opening the mail merge letter template (09:10)
Now that I have reviewed and saved the letters I’ll print them. After that, I’ll close down the document with the 14 pages. Next I’ll save the changes to my letter template and close it down as well. Next time I open up the letter template for our next workshop I will get a warning message telling me that opening this document will run a SQL command. Click “Yes” here and select the contacts folder from Outlook. To use the template again just click the “MAILINGS” tab and make the changes you need to your new welcome letter.
Using Mail Merge I have saved a lot of time by automating the process of personalizing multiple letters.